Monday, December 27, 2010

And we're back.... again....

Hello out there! I'm sorry for the slump in new posts lately- I assure you I have been eating, it's just been less than exciting food since we've been so busy. Now that we've sort of fallen back into the rhythm of work/store or cook/gym I can finally start cooking again. It couldn't have come a moment too soon because we recently had a nifty little cold front that made me crave chili. This chili is a little different because it includes sweet potatoes, but man oh man is it good! Give it a try!


Ingredients
Small Slow Cooker
1 Sweet Potato, peeled and cubed
1 diced yellow onion
2 minced garlic cloves
2 cans of red kidney beans, drained and rinsed (I used dark and light red)
1 14.5 ounce can of tomatoes
1 tbl chili powder
1 tsp paprika
1/2 tsp kosher salt
1 1/2 cup water

Directions
Throw everything into a small slow cooker. Cover and cook on low for 6-8 hours or high for 3-4, until the sweet potatoes are fork tender.

Review
5 out of 5 honeybees! This was excellent, especially with sweet cornbread. Definitely a make-again dish!

Nutrition
4 servings. Each: 174.5 calories, 1.1g fat, 34.7g carbs, fiber 11.2g, protein 8.6g

Saturday, October 23, 2010

Update

Helllooo there! Just an update that I haven't forgotten about the blog- I'm at NACC conference, and eating really delicious food around Austin! I'll be back tomorrow and start updating again next week!


Thursday, October 14, 2010

Easy lunch: Mushroom, spinach and goat cheese rollups

Fact: If I could, I would only eat macaroni and cheese, pb&j sandwiches, greek yogurt, oatmeal, bananas and grapes. I swear I have the taste buds of a 5 year old. I'm not into spices or variety, and certainly not most vegetables. So when I eat veggies they have to be GOOD. So in an effort to eat more spinach I decided to work out an easy lunchtime recipe that has spinach incorporated, and I have to say it's pretty great!

Ingredients
2 whole wheat tortillas
1 tbsp (or less) butter
1 tbsp (or less) olive oil
1/2 cup fresh baby spinach
2ish ounces goat cheese
1 tbsp chopped garlic
** As a side note, keep a small jar of minced garlic in your fridge and it will cut down on prep time when you are making solo meals. You probably wont even notice the difference.

Directions
Heat a small nonstick skillet over medium.
Add a little butter and a little olive oil.
Add the chopped garlic and chopped baby bellas. Saute until the mushrooms begin to brown.
Remove the skillet from heat.
Add the baby spinach and stir mix. The residual heat from the skillet will wilt the spinach.
Once the spinach is a beautiful bright green color and still a little firm it's ready to go.

Warm your tortillas in the microwave for 5 seconds, just to get them soft.
Spread goat cheese in the center of the tortillas. You want a pretty good layer because some cheese will melt in the cooking.
Add the spinach and mushroom filling to each tortilla, distributing evenly.
Roll up the tortilla so the cheese, mushrooms and spinach are safely inside.
Heat up a george forman grill to medium.
Lightly butter the outside of the tortillas (not required), and place on grill seam side down.
Grill until lightly toasted. It should still be warm through because of the mushroom/spinach.
Cut in half and enjoy!

Nutrition
Serving 1 (2 rollups), Calories 533, Fat 40g, Protein 19g, est ww points 13
Review and Notes
I would definitely give this recipe 5 out of 5 honeybees for ease, taste and texture.

* A note about goat cheese. I really recommend seeking out good quality, local and ethically produced goat cheese. You might pay a little more than the 'national' brands, but the money stays in our community and you can seek out high animal husbandry standards, which I think is worth it. Here in DFW we are lucky to be the home of Latte Da Dairy. They care so much for their goats that they are animal welfare approved, plus their goat cheese is some of the best I've ever tasted! You can catch them at several local farmers markets, Central Market or at one of their open houses all listed on their web site.*

Wednesday, October 13, 2010

We now interrupt this blog to take part in a Texas Tradition!!

Howdy Folks!!
Yup, it's that time of year again- the TEXAS STATE FAIR!! Now, I don't know about you, but I LOVE the fair. In fact, I do believe I have begged (and convinced) Jason to take me every year that we have known each other! I think once we get to year 10 we can officially call it a tradition :0)

For those of you who are unfamiliar with the Texas State Fair, it is one of the largest and oldest (it's over 100!) state fairs in the country. The Fair runs for 24 days, and is presided over by that gentleman up top named Big Tex. As a local non-profit, the Fair supports Texas students with college scholarships, memorializes Texas heritage with the Heritage Hall of Honor and has an active preservation roll in it's almost 300 acres of art deco design. Pretty impressive for a self sustaining organization smack in the middle of downtown Dallas!

I have to admit though that even with all these great attributes, the real reason we go is the food. The FRIED food that is! The Texas State Fair has pretty much become synonymous with crazy fried foods experiments- we've seen fried frito pies, fried beer and of course fried butter! Each year there seems to be one or two new experiments that catch everyones attention and Jason and I always try them out. This year, in addition to his annual corndog and my annual funnel cake, we tried the fried s'mores pop tart.


Well, as you can see it was actually pretty tasty!! We especially liked the middle part where you really got the s'mores flavor and it was mixed with the warm fried graham cracker! I think if you make it out to the Fair this year it should definitely be on your list of things to try.

Big Tex, we'll see ya again next year!

Sunday, October 10, 2010

Veggie pot pie with whole wheat crust

Now that the fall temperatures have arrived I've had a craving for something cozy. One of my all time favorite cold weather dishes is a pot pie, so when I saw a healthy version on Cates World Kitchen I knew I should modify it to fit our taste.
Filling Ingredients
Dash of olive oil
1 chopped shallot
2 peeled and diced carrots
2 thinly sliced celery ribs
1/4 chopped red onion
1 can of garbanzo beans (chickpeas)
1/3 cup frozen peas
a little whole wheat flour
2 cups veggie broth
1/4 cup plain yogurt (we used greek yogurt)
salt and pepper to taste
1/2 tsp dried sage

Whole Wheat Crust Ingredients
1 cup whole wheat flour
1/2 tsp kosher salt
1/4 tsp baking powder
4 tbsp chilled and diced butter
3 tbsp reduced fat sour cream

Directions
Preheat your oven to 375F.

Let's make the dough first.
Mix together the flour, salt and baking powder.
Add in the diced butter and smash it into the dough until there is a good, crumbly texture.
Add in the sour cream and mix with your hands. Yes, it's messy but this is probably the best method to get everything incorporated.
You're dough will still be dry and a little crumbly, it's ok. Shape the dough into a ball, wrap in saran wrap and refrigerate while you make the filling.

Now let's make the filling.
Heat a dash of olive oil in a large skillet over medium heat.
Add the chopped shallot and saute for 1 minute.
Add the diced carrots, celery and onion and cook for 10 minutes or until tender.
Add a little flour and cook for 30 seconds, being sure to mix well and not burn the flour.
Add the 2 cups veggie broth and cook for 5 minutes, stirring frequently.
When mix begins to thicken, add the beans, peas, sage, salt and pepper, tonys and yogurt.
Stir, stir, stir until well incorporated.
Divide the mix between oven safe bowls or ramekins. We used 3 of the 2 cup pyrex glass containers and it worked perfectly, plus it makes cutting out the dough a breeze.

Now you're ready to remove the pastry dough.
Roll the dough out between two sheets of Saran Wrap, or two Slippats until it's pretty thin.
If you've used pyrex containers, use a lid to cut circles out of the dough.
If you've used a ramekin just trace the bottom with a thin knife and cut out a circle.
Place dough on top of each filling set and cut a few vents for steam.

Arrange the ramekins on a jelly roll sheet and bake until the crust is browned.

Nutrition
Servings: 3, Calories: 517, Fat: 18.6g, Carbs: 74.8g, Protein: 17g, Est. WW points: 11

The Review
We loved the filling for this recipe, but found the dough a little dry. Next time I might consider checking out other whole wheat recipes first, or going with a Pepperidge Farms pastry sheet. Overall I'd give the filling 5 out of 5 honeybees and the dough 3 out of 5 honeybees.

Thursday, October 7, 2010

Product Review: So Delicious Mini Fudge Bars

A few months ago Kroger re-opened down by TCU and I was pleasantly surprised to find that they do an excellent job carrying Veg friendly products. I was shocked to find that they carry an entire section of alternative 'meat' and 'dairy' products, an aisle filled with veg friendly frozen meals and my favorite almond milk all in one place! Today when I popped in I was craving chocolate ice cream, so I decided to see if I could scope out anything new.
Enter So Delicious Dairy Free Creamy Fudge Bar Minis.
Oh Heaven.
These little treats have an organic coconut milk base, and are only 70 calories. Their taste and texture is very similar to a frozen, light chocolate mouse. Did I mention they are the perfect portion size!? Next time you're looking for a tasty non-dairy treat I highly recommend that you try out this line.
I'd give this one 5 out of 5 honeybees.
Enjoy!

Wednesday, October 6, 2010

And we're back!!

Welcome back to Almond Milk and Honey! After taking a bit of a hiatus to study for the Bar exam and well, recovering from the Bar exam, I'm finally ready to get back in the kitchen. My goal is to share healthy and flavorful plant based recipes with you a few times per week and include a sprinkling of not so healthy baked goods! If you have any special requests be sure to let me know. Thanks again for reading my blog and here's to a beautiful life!

Monday, March 8, 2010

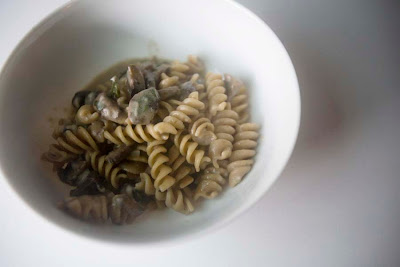
Toasted Mushroom Pasta

Yum! This stuff is good! And quick! And moderately healthy! I totally recommend trying it!


Ingredients
3 Tbl olive oil
1 Tbl butter
2ish cups of mushrooms thinly sliced, we used portabellos
2 minced garlic cloves
1/4 cup chopped flat leaf parsley
1 tsp dried oregano
1/2 cup white wine
1 1/2 cup pasta, we used whole wheat spirals
2 cups veggie stock
1/4 cup cream
1/4- 1/2 cup grated parm cheese
fresh ground black pepper
salt to taste

Directions
In a large skillet on high heat, add 1 Tbl olive oil. Saute the mushrooms until just brown, 2-3 minutes. Reduce heat and add parsley, garlic and oregano. Cook for about a minute. Pour in wine, and simmer for 3-5 minutes. Remove from heat and transfer mushrooms and sauce to bowl.

In another skillet, add remaining olive oil and butter. Add pasta and cook until a golden brown, about 5 minutes.

Once toasted, pour in the veggie broth and bring to a boil. Reduce the heat and simmer uncovered until pasta is al dente, about 10 minutes.

Add the mushroom mix and cream to the pasta. Cook for a few more minutes until the sauce comes together.

Remove from heat and stir in parm and pepper.

Nutrition
This assumes 4 servings, this is for 1
Est WW points: 7
Calories: 327
Fat: 22.7
Carbs: 18.4
Fiber: 2.9
Sugar: 1.7
Protein: 9.7

Enjoy!!

Ooohhh a new blog post!!!

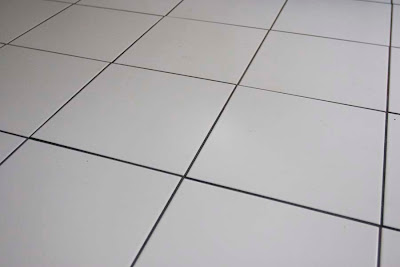
Which must mean that THE FLOORS ARE DONE!!!!! Yippeee! Our kitchen is still a wreck, so I just took a quick photo of the lovely floor to share with you. It's just what I wanted, and it makes my cozy little kitchen feel so much bigger!


Next up: toasted mushroom pasta :0)

Thursday, March 4, 2010

Kitchen Update

Soooo we're going on Day 4 without being able to walk in our kitchen. The house is in disarray, I keep having panic attacks that one of us will step on the tile and obviously RUIN the whole project (because I'm a little type A like that), we've been endlessly shuffling the dogs around, and worst of all I haven't been able to cook.
anything.
in well over a week.
So, in the midst of my panic tonight when at 11 pm I realized I havent had anything decent to eat since practically eternity I reached for the most obvious answer out there-
Marshmallow Fluff.
Yes, readers, I ate a whopping spoon full of Marshmallow Fluff. And ya' know what? It made me a bit happier inside. Hopefully, the kitchen will be done soon and I'll be able to share our beautiful new floors with you. Until then I encourage you to grab a spoon.

Monday, March 1, 2010

Update- New goodies coming this week

I have not abandoned the blog! I've been a bit sickly because of the weather and its been my birthday week which has meant lots of eating out! I have a few updates planned this week, so check back later for some brand new goodies to try out!!

Friday, February 26, 2010

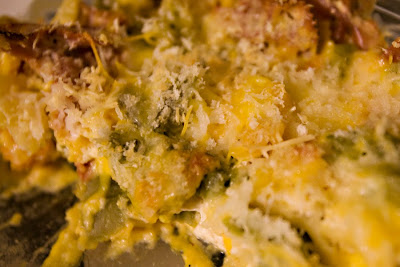
Lowfat Mac and Cheese!

Ok, so I really need to stop using tri-colored noodles, especially the green ones. This photo doesnt necessarily look tasty, but I promise you that it was. This is a really yummy, healthy alternative to boxed mac and cheese that even a kiddo enjoyed! This excellent recipe was created by the Moosewood Restaurant.


Ingredients
1 1/2 cups lowfat cottage cheese
1 1/2 cups nonfat or lowfat buttermilk
1 tsp grain mustard
1/2 tsp cayenne or chili pepper
1/2 tsp salt
1/2 tsp black pepper
1 cup shredded or small cubed extra sharp cheddar
1/2 pound UNCOOKED macaroni or farfalle
2 tbsp granted parm cheese
1/2 cup bread crumbs or panko

Directions
Oven to 375. Prep a 9 inch baking pan with olive oil or cooing spray.

In a blender or food processor, combine cottage cheese, buttermilk, mustard, cayenne, salt and pepper and pulse until smooth.

In a large bowl, combine puree with macaroni and cheddar. Mix well. Pour mixture into prepped pan.

Sprinkle the parm cheese on top of the macaroni mix, then top with panko.

Bake 45 minutes, or until the top is brown and center is firm.

Nutrition
Oye! We have totally forgotten how many servings this is for :0( Sorry we dropped the ball, but I do not have nutrition for this dish.

Enjoy!

Tuesday, February 23, 2010

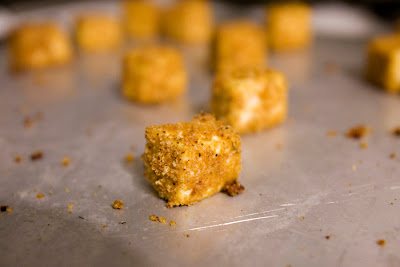
Shake and bake tofu

I know just what you're thinking.... 'really Dori, shake and bake tofu???'. Oh yes my friends. And it's glorious. Our attempt at shake and bake tofu actually came out of a sort of conundrum to figure out if it would work and boy did it! This is the perfect side dish to the upcoming Lowfat Mac and Cheese. For days that you're just craving comfort food you cant go wrong here!


Ingredients
1 package of extra crispy shake and bake
1 block extra firm tofu
Optional:
Marinade- I used honey and a little cider vinegar mixed together, but feel free to go crazy!

Directions
** although you're using 'shake and bake', you risk having very mushy tofu of you actually shake it. I recommend dumping the bread-crumbs into a flat plate or bowl to create more of a dredging station.

Oven to 500.
Remove tofu from package and press. Slice pressed tofu into 1/2 inch squares.

If marinading, dip individual tofu pieces into the marinade and immediately place into dredging bowl to cover with bread-crumbs. Arrange in a single layer on a large baking sheet.

If you're not marinading, just place individual tofu pieces into the breadcrumbs for a quick roll around. Arrange in a single layer on a large baking sheet.

Bake for approximately 30 minutes, until nice and crispy, flipping every 10 minutes or so.

Enjoy!


Sunday, February 21, 2010

Portobello 'Pizza'

This is a SUPER easy, quick meal to make for lunch or dinner. I literally ran home over a break during class, did about 5 minutes of prep and ate a delicious (and healthy!) lunch less than 20 minutes later. Awesome!


Ingredients
1 Portobello mushroom cap
2-3 Tbl Spaghetti sauce, whatever you have on hand (I used a traditional tomato basil)
A good sprinkle of shredded mozzarella cheese
(I also added a little sprinkle of a parm mix I had on hand)

Directions
Lightly wipe down the mushroom cap with a damp napkin. Trip out the stem.

Oven to broil.

Place upside down mushroom cap (stem portion up) on baking sheet. Spoon in spaghetti sauce, and top with choice of cheese.

Broil for abut 10 minutes, or until the cheese is nice and bubbly and you're confident that the mushroom is cooked throughout.

Nutrition
This recipe is for 1 serving.
Est WW points: 3
Calories: 120
Fat: 5.3g
Sodium: 274
Carbs: 4.5 g
Fiber: 1.2 g
Sugar: 3.1 g
Protein: 8.5 g

Notes:
If you happen to have a little oregano or basil laying around dont be scared to cut it up and toss right on top. This dish makes an excellent lunch, especially when paired with a nice crusty bread and a little olive oil!


Thursday, February 18, 2010

So, what do you eat anyway?

Surprisingly, I get this question a lot. I understand that for a lot of people, it's really hard to imagine their lives without meat and heaven forbid that you lighten up a little on the dairy. Fortunately, there are LOTS of really great meat substitutes out there! While we dont eat them very often, we do have our favorites that we keep in the house so I thought I'd share what we consider to be the 'best' meat and dairy substitutes out there.

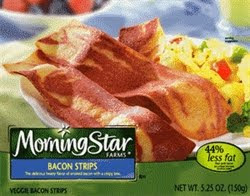
When I first though of giving up meat, honestly one of the hardest things for me was bacon. I have NO IDEA why, really its pretty gross when you think about it, but dang it sure can be tasty when used in the right dish. I was THRILLED when I found Morninstar Farms Veggie Bacon Strips- they smell just like traditional bacon, are excellent inside of a grilled cheese and at only 60 calories per serving infinitely healthier than the real thing.


If bacon's not your thing Morninstar also makes an excellent veggie sausage pattie. I like the traditional, but Jason likes the maple. When J (Jasons little brother) was over for breakfast one day he didnt even believe me that these were veggie based- I actually had to show him the box to get him to believe they were not meat. If you're looking for a great transition piece, we highly recommend this one!


For lunch or dinner, the most flexible source of protein has got to be tofu. It soaks up any marinade you might throw at it, is quick and cheap! I use tofu in our recipes often, and find that I prefer the extra firm texture the best. Dont get disheartened if the first few times you venture into tofu land you lose your way a little- once you find the perfect cooking method for you it becomes much easier! Tofu can now be found in most grocery and big box stores and can be either conventional or organic. If you dont use the whole block, it's easy to store in a sealable container with fresh water and will keep for 5-7 days.


For nights that we're craving convenience or burgers, our go to is the Gardenburger. I prefer garden burgers because they are vegetable based, but if that's not your thing Bocas are soy based and Morningstar has a black bean based. Veggie burgers can be highly subjective, and it's entirely normal to love some and hate others. I recommend that you grab a few boxes next time you grill out and make 1 of each to sample :0)


The last thing I want to share is a dairy alternative. I am vegetarian- which means that I do eat eggs and dairy on occasion, but I've been making a conscious effort to limit my dairy to only baking or food prep. I'm not a huge fan of soy milk, or rice milk however I LOVE almond milk. Several brands carry an almond option, including Almond Breeze and Silk. I use unsweetened for most baking, and the sweetened vanilla for oatmeal or chai tea. Yum!


I hope this has been helpful- especially for those of you joining us for Meatless Mondays! With so many healthy and tasty options out there, it's easy to eat green!

Wednesday, February 17, 2010

Can I just say

that I have never, ever felt better about what I'm eating. I love that I'm finally eating for me- ethically, clean and local.


Tuesday, February 16, 2010

Pineapple fried rice

This is a really great side or main dish. The addition of tofu helps prop up the protein count and it tastes really good too boot! This recipe uses the baked tofu method, which I highly recommend! This recipe is modified from the Moosewood cookbooks.

Ingredients (*this makes 8 servings, it can easily be halved)
1/2 cake firm tofu
1/3 cup soy sauce
1 tsp dark sesame oil
3 tbl vegetable oil
3 minced garlic cloves
1 tbl grated or chopped ginger
1 diced red bell pepper
1 diced celery stalk
2 minced scallions
1 20oz can unsweetened pineapple chunks mostly drained or 2 cups fresh pineapple chunks
4 cups cooked brown rice
1 cup toasted cashews

Directions
Oven to 500.

Cube the tofu. Place in a single layer on sprayed or nonstick baking sheet. Bake 10 minutes, or until top browns slightly. Remove from heat and flip.

Mix together the soy and sesame oil. Brush lightly over the tofu. Return tofu to the oven for another 10 minutes, or until browned and slightly crispy. Remove from heat and set aside.

In a wok, heat the vegetable oil on medium heat. Add the garlic, ginger and chili paste and stir fry for 1 minutes.

Add the pepper, celery, scallions and tofu and stir fry until veggies are tender, about 5 minutes.

Add the pineapple and cooked rice and stir fry until rice is hot, about 3 minutes.

Serve with topped cashews.

Nutrition
This recipe makes approximately 8 servings, this is for 1 serving
Est WW points: 7
Calories: 315
Fat: 16.5 g
Carbs: 31 g
Fiber: 3.3 g
Sugar: 1.2 g
Protein: 8.9 g

Enjoy!

Friday, February 12, 2010

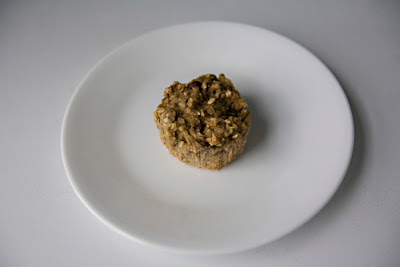
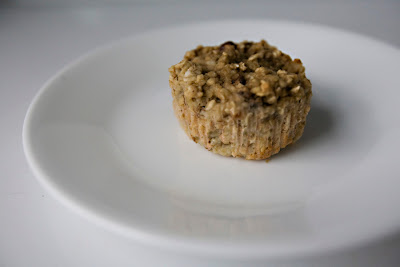
Oatmeal cups

This is the healthier, morning version of the chocolate covered banana bread. I happen to love eating oatmeal in the morning, but dont always want to take the time to make it- well, this recipe solves it. Make a batch of these, pop one in the microwave for 10-15 seconds before you head out the door and presto you have all the goodness of oatmeal in a handy portable shape.


Ingredients
3 mashed ripe bananas
1 cup milk or milk sub (we use almond milk)
2 fresh eggs
1 tbl baking powder
3 cups old fashioned oats
2 tbl vanilla
3 tbl mini chocolate chips

Directions
Oven to 372.

Mix all ingredients but the chocolate chips together.

Spray or line muffin pan.

Fold chocolate chips into oatmeal batter.

Divide batter into about 18 cups (mine made 19, but it could have probably been distributed a little fuller).

Bake 20 minutes, or until the edges just start to brown and they become firm.

Nutrition
This is assuming 18 muffing, this is the nutrition for 1 muffin
Est WW points: 2
Calories: 95
Fat: 2.5g
Sodium: 70 g
Carbs: 16 g
Fiber: 2 g
Sugar: 4.5 g
Protein: 2.5 g

Thursday, February 11, 2010

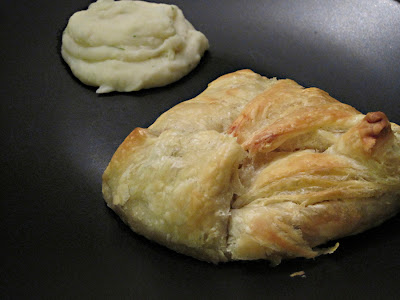
Puffs

Pastry sheets are our very own little gift from God. Seriously, these suckers can be filled with a myriad of flavorings, cut large or small and bake up way more impressive than the work justifies. I have made a version of this mushroom puff for years now and just about everyone likes it. Give it a try and I think it'll become a favorite in your house too.

And yes, I know this was a carb-tastic meal, but hey, I had 2 guys to feed and this is what they wanted. 

Ingredients
1 defrosted package of pastry sheets
2 large, cubed portobella mushrooms
1 can cream of mushroom soup (I usually get the one with roasted garlic too!)
Olive oil

Directions
Oven to 400.

In a skillet over medium heat, warm a small amount of olive oil.

Saute mushrooms 2-3 minutes, or until they just begin to soften.

Add 3/4 can cream of mushroom soup, and a small amount of water (to help dilute) to the skillet. Continue cooking/stirring about 8 minutes, or until mushrooms are cooked all the way through and mushroom 'sauce' begins to thicken.

In a large surface, lay out 1 pastry sheet. With a sharp knife, cut diagonally to create 2 large triangles. Repeat with second pastry sheet.

Place 1 triangle on nonstick or sprayed pan. Spoon a 1/4 of the mix into the center of the pastry sheet and fold each side onto each other, creating a large 'dumpling' style fold. Repeat with remaining 3 triangles.

Bake for 20ish minutes, or until puff is well, puffed and golden brown.

Nutrition
Working on that. We can all thank pepperidge farms for creating the most moronic serving size ever 1/6 of a sheet. I'll update when I'm able to figure it out :0)

Enjoy!

Tuesday, February 9, 2010

Pasta with caramelized onions, mushrooms and gruyere cheese

This 'recipe' spawned out of a bit of bad luck with some lackluster pasta. I decided to go out on a limb and spend a few extra bucks on some of the new fresh pasta at Central Market, thinking surely it would be better than tried and true barilla... but no, in fact it was not. And then I had a whole package of pasta that needed to be used up in a creative and yummy way. By adding a few extra ingredients that I had on hand I whipped up a really great lunch!

Ingredients
1/2 onion, thinly copped into strips
3-4 sliced crimini mushrooms
1 serving of your favorite (or not so favorite pasta)
1/4 cup freshly grated gruyere cheese
1-2 Tbl olive oil
splash of a good red wine

Directions
Boil water, and cook pasta.

While pasta is cooking, pour olive oil into a skillet on medium heat.

Add onions. When onions start to brown, add mushrooms and continue to cook until mushrooms are almost caramelized.

Add a splash of red wine, and de-glaze the bottom of skillet. Continue cooking 1-2 minutes until liquid is absorbed. If veggies are not quite finished up, just add more wine and continue cooking.

Remove pasta and plate. Top with onions and mushrooms. Grate fresh gruyere cheese onto pasta.

Notes
I actually highly recommend Barillas mushroom filled pasta, which can be found in most grocery stores in the refrigerated section. Its yummy, quick and easy!

Enjoy!!

Saturday, February 6, 2010

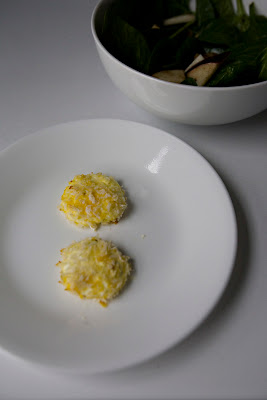
Goat cheese medallions

These little snacks are perfect for a nice salad and add an extra little crunch. Plus they're surprisingly easy!


Ingredients
Goat cheese, either flavored or plain but the best you can find
2 eggs
Panko

Directions
Oven to 425.

If goat cheese is in a round, cut log into 1/2 inch thick rounds. If goat cheese is in a tub, use a large spoon to scoop out a small amount and then form into a round about the size of a quarter.

Crack eggs into a bowl. You can use either egg whites only to preserve the white color of the goat cheese, or use the whole egg to add a little color. Prepare the panko for dredging.

Dip each goat cheese round into the eggs, and dredge both sides in panko.

Bake in a single layer for 10 minutes. Put oven on broil and allow to brown. Flip over carefully and brown the other side.

Enjoy!

Wednesday, February 3, 2010

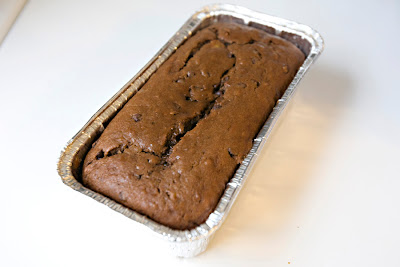
Chocolate dipped banana bread

Ooohhh man, this recipe is good! One of my best friends, Erum, sent this recipe over from The Messy Cook asking if we would make it together one day- since it's her birthday I thought I'd whip up a big batch for her to enjoy without the work! If you like traditional banana bread and chocolate is your thing I highly recommend making this tasty treat!

I picked up this super cute silicone baking sheet last valentines day at williams sonoma, it made for really great '2 bite sized' treats!


Ingredients
3/4 cup sugar
1/2 cup softened butter
2 eggs
1 cup mashed bananas (2-4 bananas)
1/2 cup sour cream
1/2 tsp vanilla
1 1/2 cups flour
1/4 cups cocoa powder
1 tsp baking soda
1/4 tsp salt
1/4 tsp baking powder
1/2 cup semi sweet mini chocolate chips
1-2 loaf pans

Directions
Oven to 350. Lightly butter or spray a loaf pan.

In a medium bowl, cream together the sugar and butter. Beat in the eggs one at a time, stirring well with each addition. Add the mashed bananas, sour cream and vanilla and stir until smooth.

In a separate bowl, sift or mix together flour, cocoa, baking soda, salt and baking powder.

Add flour mix to the wet ingredients and just combine. Fold in chocolate chips.

Bake for 50-60 minutes or until bread is firm to the touch and a toothpick comes out clean. Allow to cool on a rack for 10 minutes before slicing.

Nutrition 
To be honest, I'm not entirely sure. As you can see, I got a little um, creative with my packaging so I dont really know how many traditional servings it would be. I'm going to make an educated guess and say that you can probably do 2 loaf pans, with 8 servings each comfortably. So this nutrition section assumes 16 servings, and is representative of 1 serving- BUT be prepared to eat many more than one :0)

Est. WW points: 4
Calories: 195 
Fat: 9.8g 
Carbs: 26.1g 
Fiber: 1.4 g
Sugar: 14 g
Protein: 2.8 g 


Enjoy!

Monday, February 1, 2010

Chi-Chi-Chicago

The hubs and I decided to take a weekend off and head out to Chicago! We had a great time, and did what we did best- EAT!
We stayed at the lovely Hotel Blake. It was right off of the subway, which meant we could travel all around Chicago for the shocking low price of $14 for the whole weekend!


Our first night in we decided to go big and have Chicago style pizza. Man, we were not disappointed! In true Dori style, we took our recommendation straight from Throwdown with Bobby Flay and visited Lou Malnati's Pizzeria.

Oh Oh they did not disappoint! Surprisingly, the namesake pizza the 'Lou' was vegetarian! Chicago style pizza is very different than your average pizza and deceptively filling. Yum!

The next morning we woke up and decided to travel Chicago a bit. First up was the Smart Museum. I think that this museum might be the best kept secret of Chicago- sure it's a trek even on the L, but it's free and has an awesome private collection to share!
Many thanks to Lynds for letting me borrow her awesome puffer jacket

The Smart has over 10,000 individual pieces in their permanent collection! It's also the first museum that I've visited that has a dedicated space for German artists, Italian artists and for a little hometown flavor artists from Chicago. Can anyone name the artist of this piece?? It's one of my favorites :0)

After touring the gallery, we hopped back on the train and hit up the DePaul University area. After a quick tip via Urbanspoon, we found ourselves in Toast. OMG, go there. and get the lemon pancakes. and thank me later. I have a minor obsession with all things lemon, so when I saw these lemon pancakes lightly dusted with powdered sugar and drizzled with honey I was in heaven.

It didnt hurt that my studly travel companion was pretty smitten with his breakfast too.

Next up was a fun event known as the Polar Bear Swim, which is where a handful of truly crazy, er, dedicated people strip down to their skivvies and brave the icy waters of Lake Michigan for charity.

It was sooo cold! And we quickly found out why, even the lake was frozen over!

Our last, but very notable trips were to the Chicago Diner and Yolk.
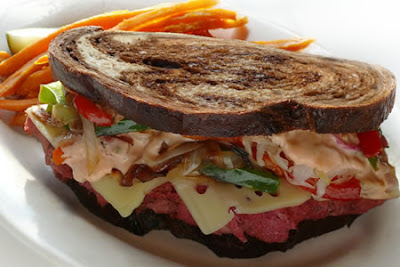
We totally forgot to take pictures at both, which is only a tribute to how gloriously yummy their food was! The Chicago Diner is a landmark vegetarian restaurant famous for their Radical Rubens. Jason approved :0)

An at Yolk, I swooned over the Banana Blue Pancakes which were banana pancakes with blueberries and granola mixed in! Yuuuuummmy!

Here's to another excellent adventure!

Sunday, January 31, 2010

Chicago update coming soon!

The hubster and I made a trip to the windy city this weekend- and BOY did we EAT! I'll have a blog post up in the next few days with some of our favorites :0)

Wednesday, January 27, 2010

Easy Eggplant Parmesan

Ooohh this is good. And easy. And healthy. What's not to love?! This would be an excellent dish for you meat eaters to serve on your next meatless Monday.

And seriously yall, this was a lot prettier in person. I need to figure out how to take a prettier picture in the evening without it looking all green. 


Ingredients
1 large eggplant
1/3 pound freshly sliced mozzarella
a little parm cheese
a little garlic salt
1 egg
a drizzle of olive oil
panko or bread crumbs
flour
tomato sauce

Directions
Preheat oven on broil. Wash the eggplant, then slice into 1/4 inch rounds, skin on.

Set up 3 dredging stations:
1 with a handful of flour
1 with a beaten egg and a little olive oil
1 with the panko, a little garlic salt and a little parm cheese

Place 1 eggplant round into the flour to coat evenly, flipping to get both sides. Using a fork, dunk the same eggplant round in egg mixture and then coat in the panko mixture on each side.
Place coated eggplant on lightly greased baking sheet and repeat steps with each eggplant piece. It sounds like it will take a while, but it'll go very fast.

Once all the eggplant pieces are ready to go, pop them under the broiler for a few minutes. Keep a close eye on them, and allow the panko to brown just a little.

Remove the pan from the oven, flip each eggplant piece using tongs and return to the broiler to brown the other side.

Remove from oven, and change the temperature to 450.

In a large rectangular pyrex, pour in about half of the tomato sauce (of course you can use more or less to taste). Arrange the eggplant pieces in the dish. Top each eggplant with a proportional size of mozzarella.

Pop in the preheated oven about 8 minute, or until the cheese melts and the tomato sauce just bubbles.

Nutrition
This will depend on the size of your eggplant, but ours made 10 slices, which is about 4 servings when you include a side. This is for 1 serving.
Est. WW points: 7 
Calories: 352
Fat: 14.8g
Carbs: 40.5g
Fiber: 6.6g
Sugar: 7.8g
Protein: 14.5g

Notes
Why use panko? While not perfect, I mean, you're still breading something, panko is often seen as the healthier cousin of breadcrumbs. They are lighter, stay crispy longer and have fewer calories than their heavier handed brethren. Plus I like the taste :0)

We served this with homemade mashed potatoes, but it would also be delish with a side of whole wheat noodles and a bit more sauce. 

Homemade mashed potatoes

Why use a box when you can easily make mashed potatoes from scratch? We really liked the texture of these, and because they are homemade you can add any seasoning mix you'd like!


Ingredients 
3 medium sized yukon gold potatoes 
1/3 cup buttermilk 
2 tbl unsalted butter
salt and pepper to taste 

Directions 
In a large saucepan, get a full pot of water boiling. 

Peel and cube the potatoes. Once water is boiling, add potatoes and cover. Once water has returned to a boil, remove cover and lower heat to a strong simmer. Cook for 10-15 minutes, or until potatoes are fork tender. 

Remove potatoes and drain. In a large bowl, add the cooked potatoes, buttermilk, and butter. Mash well :0) Add salt and pepper to taste. 

Nutrition 
This recipe makes 3 generous servings. This is for 1 
Est WW points: 5
Calories: 242
Fat: 8.1g 
Carbs: 39g 
Fiber: 4.7g 
Sugar: 3g
Protein: 5.3g 

Easy Peasy! Enjoy!